

Wrinkled transfer paper and double images usually call for a close look at the paper feed, rollers and print head. In troubleshooting a stencil machine, clean carbon residue from the rollers and clear a clogged thermal print head with alcohol, then test the printer with a simple design.
It’s frustrating when a stencil that should be crisp comes out creased, faint or doubled, especially when the cause isn’t obvious. Narrow down the problem by checking one part of the machine at a time, rather than changing several settings or components at once.
This guide explains how to inspect the print head and rollers, address common paper-feed problems and identify when a fault may need further attention. You’ll also learn how to check stencil paper orientation when a transfer produces a double image, with practical steps to help pinpoint the cause.
Key Takeaways
- Prevent double transfers by checking the stencil paper layers and keeping the transfer sheet correctly positioned as you peel it.
- Inspect power and charge when a thermal printer won’t start or produces faint, blurry output.
- For uneven feeding or jams, look for oil buildup, tracking misalignment or a lower feed roller that no longer grips smoothly.
- Use a simple test design to help narrow down print faults before returning to a detailed stencil.
Why Is My Stencil Transferring Twice (Double Image)?
- Check the paper layers. A double image can happen when the transfer sheet shifts or is peeled away incorrectly. Keep the carbon transfer sheet on top and the white backing paper underneath when peeling off the stencil. Confirm the layers are aligned before feeding paper into the printer.
- Position the sheet carefully. Align its edge with the feed guides, then keep the paper flat as the rollers draw it through. If one side enters first, the design may skew or appear doubled. Avoid pulling or pushing the sheet while it feeds.
- Prevent creases before printing. Store stencil paper flat and handle it by its edges. Smooth visible folds before loading; a crease can change how the sheet contacts the print path. Choose paper suited to a thermal stencil printer and its feed format. For irregular-shaped paper, a carrier sheet can help distribute heat evenly.
- Run a simple alignment test. Print a line-only design, such as a large Z, and inspect whether its edges remain crisp and single. If the test is clean but a detailed design ghosts, simplify the artwork and test again. This separates image-file issues from paper handling problems.
- Check image registration. Compare the test design’s start and end points with the paper edges. Consistent offset suggests the sheet is entering crooked; a doubled outline across the whole image suggests movement during feeding. Correct the paper position before changing artwork settings.
- Know when to repair. Clean or realign parts when residue or misfeeding explains the defect; replace parts that are visibly damaged or worn. In Australia, repair costs depend on the diagnosis, labour and replacement parts.
- Use the correct reset and manual. Error codes vary by machine model. Match the code to the manufacturer’s manual, then follow its reset sequence; if the code returns, manufacturer support can direct you to Australian service technicians.
- Keep troubleshooting controlled. Switch off and disconnect power before cleaning internal parts. Keep alcohol away from electrical components, and let cleaned areas dry fully before reconnecting the machine.
Print-head and roller cleaning
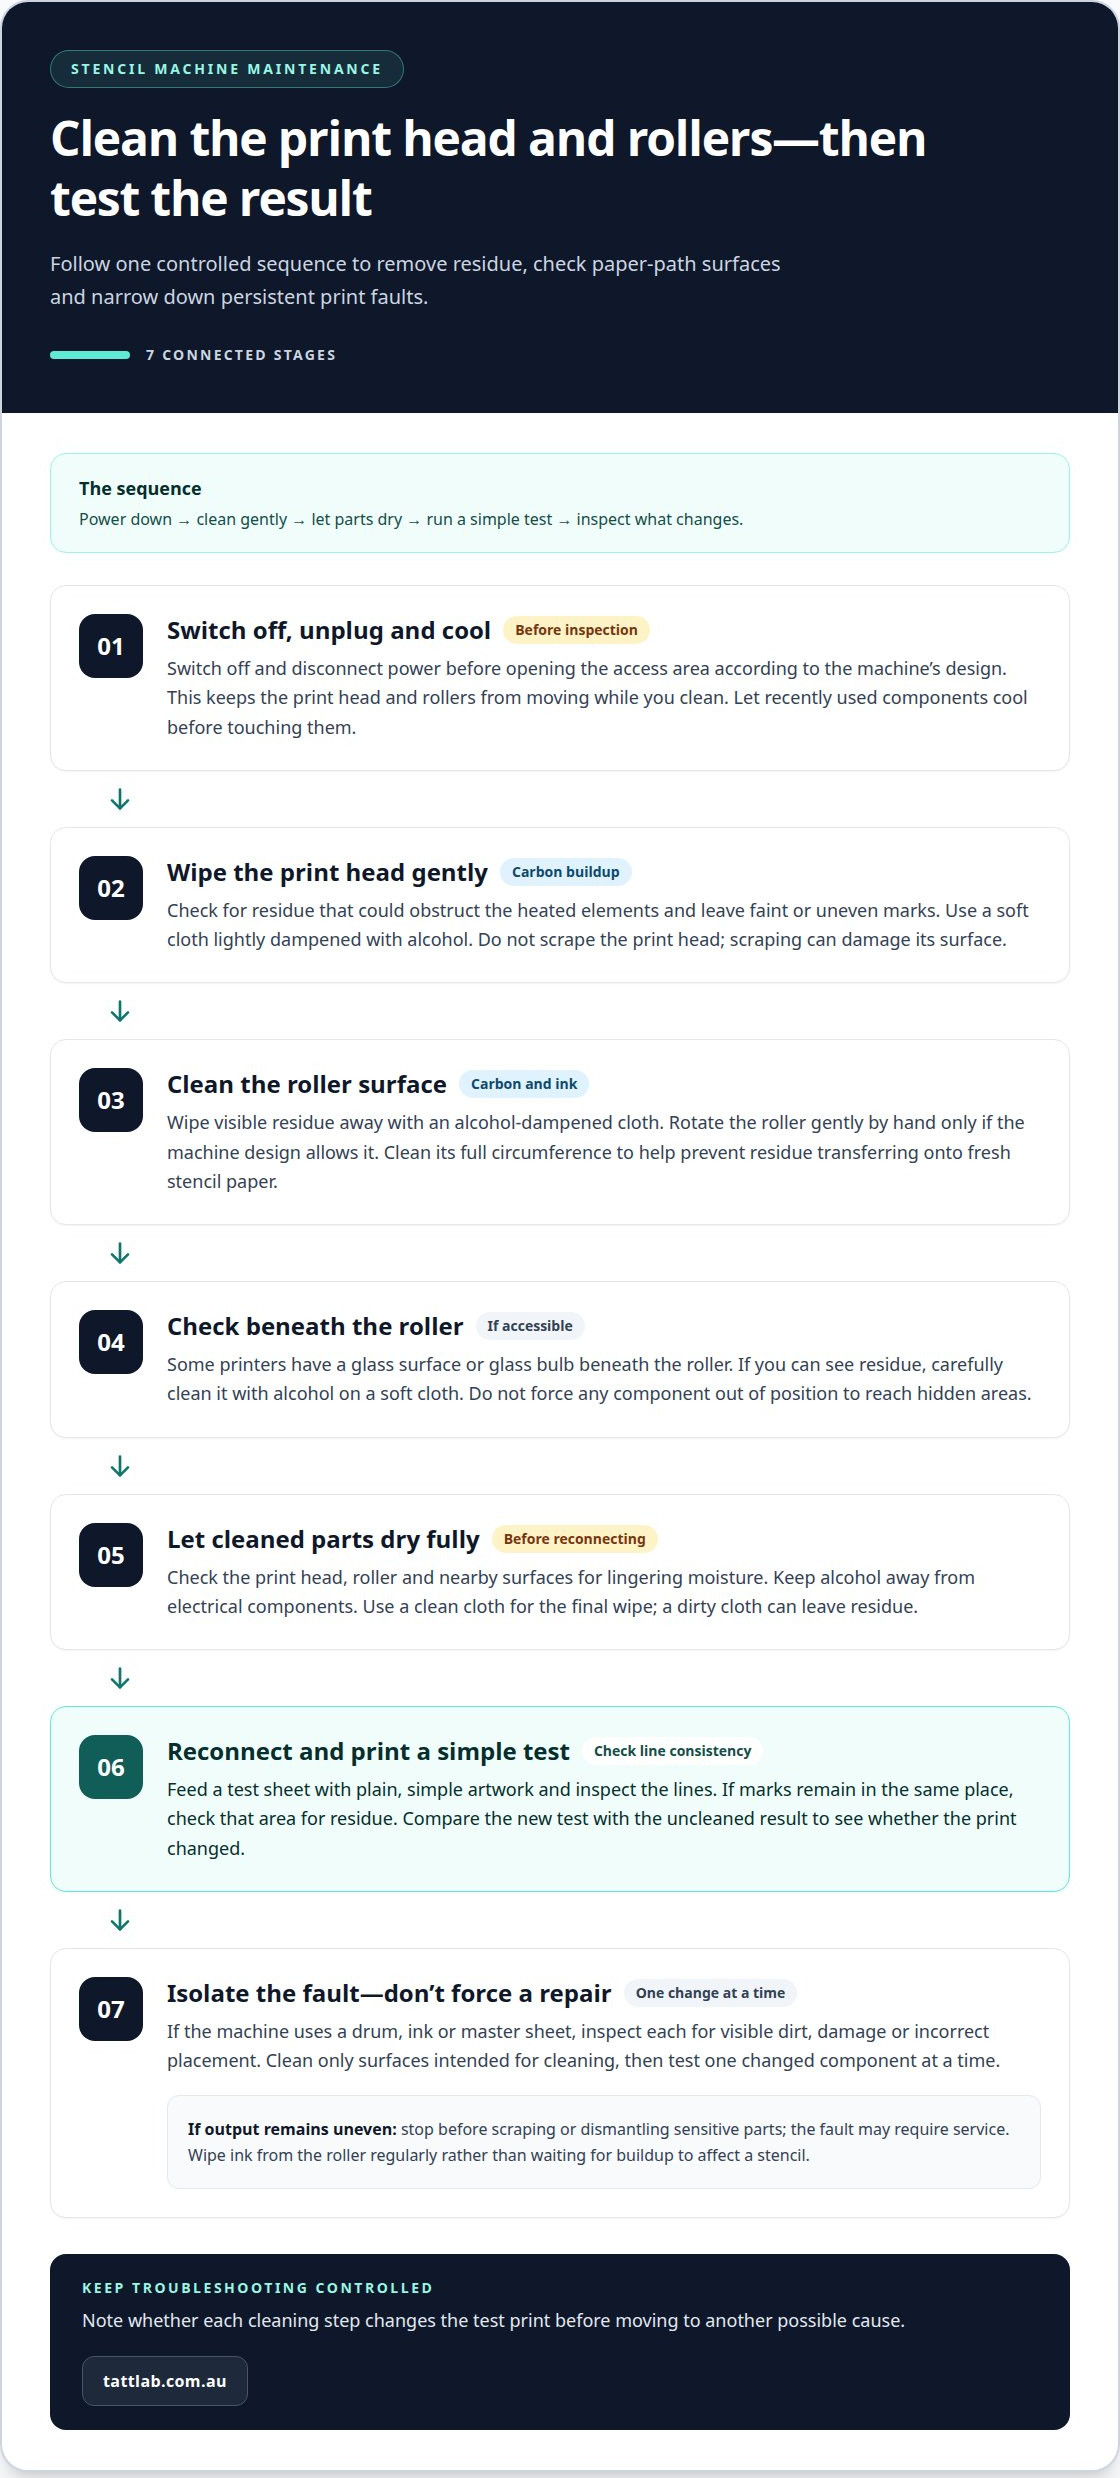
- Switch off the printer before inspection. Unplug it, then open the access area according to the machine’s design. This prevents the print head or rollers moving while you clean. Let recently used components cool before touching them.
- Check the print head for residue. Carbon buildup can obstruct the heated elements and leave faint or uneven marks. Use a soft cloth lightly dampened with alcohol to wipe the print head. Avoid scraping it, which can damage the surface.
- Clean the roller surface. Wipe away visible carbon residue and ink with an alcohol-dampened cloth. Rotate the roller gently by hand only if the machine design allows it. Cleaning the full circumference helps prevent residue transferring back onto fresh stencil paper.
- Inspect beneath the roller. Some printers have a glass surface or glass bulb under the roller. If residue is visible there, carefully clean it with alcohol on a soft cloth. Don’t force a component out of position to reach hidden areas.
- Allow cleaned parts to dry. Check the print head, roller and nearby surfaces for lingering moisture before reconnecting power. Alcohol can leave residue if the cloth is dirty, so use a clean cloth for the final wipe.
- Test with plain, simple artwork. Feed a test sheet after cleaning and look for consistent lines. If marks remain in the same place, inspect that area for remaining residue. If the print changes, compare it with the uncleaned result.
- Separate print faults from paper faults. For a drum, ink or master sheet problem on a machine that uses those components, inspect each for visible dirt, damage or incorrect placement. Clean only surfaces intended for cleaning, then test one changed component at a time.
- Make cleaning routine and targeted. Wipe ink from the roller regularly, rather than waiting for buildup to affect a stencil. A methodical approach to troubleshooting a stencil machine means noting whether cleaning changes the test print. If output remains uneven, stop before scraping or dismantling sensitive parts; the fault may require service.
How do you troubleshoot a stencil machine that won't turn on?
- Confirm the power source. Check that the power cable is firmly connected at both ends. Test the wall outlet with another working device, then reconnect the printer. A loose plug or inactive outlet can make a functioning machine appear unresponsive.
- Inspect the cable and adapter. Look for cuts, crushed sections, bent pins or a loose connector. Don’t use a visibly damaged cable. If the printer has a separate adapter, check that its connections are secure and use the equipment specified for that model.
- Check battery charge. For a rechargeable thermal stencil printer, connect its charger and allow it to charge before testing again. Low power may cause faint or blurry prints, and a depleted battery may prevent normal operation. Check the printer’s indicators for a charging response.
- Try the power control deliberately. Press the button as described in the machine’s manual; some models require a sustained press rather than a quick tap. Watch for indicator lights, display changes or sounds. Note whether the printer responds briefly, then shuts down.
- Disconnect accessories and reload. Turn the machine off, remove the stencil paper and disconnect non-essential accessories. Reconnect only its power source, then try starting it again. This can help isolate whether a connected accessory or paper obstruction is affecting startup.
- Check for heat-related shutdown. A thermal stencil printer uses a heated print head and does not require ink or toner. If it stopped after repeated printing, let the machine cool before restarting. Don’t touch the print head while it may still be hot.
- Read any displayed error. Record the exact code or indicator pattern and compare it with the manual for that model. Reset only using the stated procedure. Error meanings and reset steps vary, so avoid guessing or repeating an unfamiliar sequence.
- Stop if the fault persists. If a charged printer remains unresponsive, or its cable, adapter or casing appears damaged, disconnect it. Don’t open electrical components yourself. Give the model details and observed indicators to the manufacturer’s support team for diagnosis.
How to fix a stencil machine that feeds paper unevenly or jams?
- Stop the feed and remove the sheet. Switch off the machine before clearing a jam. Pull paper out gently along its feed direction. If it tears, remove every visible piece without forcing the rollers.
- Check how the paper sits. Reload a flat sheet, aligning its edge with the machine’s guides. Keep the paper centred as it enters. A skewed start can make the design slant or cause the sheet to buckle.
- Look for oil buildup. On a manual stencil machine, oil residue can make oilboard move erratically. Inspect the feed path and remove visible buildup using the cleaning method specified for that model. Retest with a clean sheet.
- Watch the tracking. Feed oilboard through a manual machine and observe whether it drifts. If the characters slant as the board moves, the tracking needs adjustment. Use the machine’s manual to locate the tracking control and adjust it gradually.
- Assess the lower feed roller. Check whether it moves smoothly and grips the oilboard consistently. A worn roller may slip instead of advancing the sheet evenly. If its surface is damaged or movement remains uneven, replacement may be needed.
- Test one change at a time. Feed a simple stencil sheet after each adjustment. Note whether it enters straight, advances smoothly and exits without creases. Changing one setting at a time makes the cause easier to identify.
- Consider the paper format. If your printer struggles with irregular-shaped stencil paper, use a carrier sheet to help distribute heat evenly. Keep the stencil paper positioned securely so it doesn’t shift during feeding.
- Know when to stop. If repeated jams continue, avoid forcing paper through or adjusting internal parts blindly. Persistent slipping, slanted output or a roller that won’t grip points to a mechanical issue needing attention.
For a clean feed test, choose tattoo stencils and check how a fresh sheet travels through your machine.
Tatt Lab
Tatt Lab supplies products for the stages around stencil preparation and application. Once your printer is feeding cleanly again, Tattoo Stencils can help you prepare designs, while Tattoo Aftercare supports clients beyond the studio session. If you’re reviewing your wider setup, Tatt Lab also offers Traditional Needles, Tattoo Cartridges and Tattoo Inks.
When restocking essentials as you get your studio workflow back on track, explore Tatt Lab’s tattoo supplies. A printer fault calls for maintenance, while tattoo supplies support the work that follows. Keeping stencil and tattoo essentials in view can make it easier to resume your routine after resolving a feed or print issue.
Contact Tatt Lab to discuss the tattoo supplies that fit your studio needs.
Build a More Reliable Stencil Workflow
A dependable workflow comes from treating each fault as useful diagnostic information. When troubleshooting a stencil machine, note the symptom, the adjustment you make and whether the next test improves. This record can help distinguish a recurring mechanical issue from a one-off paper or setup problem.
Use the same measured approach when preparing for your next session. Keep maintenance separate from tattooing, and return to detailed work only when the printer produces clear, consistently aligned stencils. If a fault continues after basic checks, avoid forcing the machine or repeatedly changing settings. Pausing protects your equipment and helps you decide what to do next.
As you plan your studio supplies, Tatt Lab offers Tattoo Aftercare, Traditional Needles and Tattoo Cartridges. For a next step, contact Tatt Lab about your tattoo supply needs.
Steady checks build confidence in your preparation, one clear stencil at a time.
For drum, ink or master sheet faults, note the symptom, the adjustment you make and whether the next test improves. If the fault persists after basic checks, pause rather than forcing the machine or repeatedly changing settings.
Frequently Asked Questions
How do I stop a tattoo stencil machine wrinkling transfer paper?
Check where the wrinkle begins to tell a paper issue from a feed problem. A crease present before loading points to handling or storage; a diagonal fold formed during printing suggests the sheet is entering unevenly. Keep unused transfer paper flat and dry, and discard sheets with stubborn folds. If only irregularly shaped sheets wrinkle, test a carrier sheet to stabilise their movement.
Why is a stencil machine printing faint, blank or streaky copies?
Match the print pattern to a likely cause. Faint output across the whole design may indicate low battery power; streaks in shaded artwork may improve when you convert the image to a clean outline. A blank transfer can result from the carbon layer facing the wrong way. With heavily filled artwork, reduce large solid-black areas that may cause a thermal printer to overheat.
How do I clean and maintain a stencil machine safely?
Use the manufacturer’s manual to find which surfaces can be cleaned and how to access them. Avoid abrasive tools, excess liquid and household cleaners that could damage the print path. A lint-free cloth helps prevent fibres collecting around the mechanism. Record the date, areas cleaned and any print changes to make recurring residue or performance issues easier to identify.
When should you repair or replace stencil machine parts, and what do repairs cost in Australia?
Clean or realign parts when residue or misfeeding explains the problem; replace parts that are visibly damaged or worn. Repair costs in Australia depend on the diagnosis, labour and replacement parts.


Comments (0)
There are no comments for this article. Be the first one to leave a message!