

The closest, brightest photo isn’t always the most truthful. Taking good photos of fresh tattoos means balancing a plain background, soft, indirect light and thoughtful framing, then editing lightly so the tattoo and skin still look as they do in person. Fresh skin can appear redder than it will once settled, so show the work clearly without disguising its natural appearance.
It’s easy to focus on the tattoo alone, but its placement and how it sits on the body are part of the design too. A close-up reveals fine detail; a wider, carefully composed shot provides context. Both are valuable when the lighting, colour and framing are consistent.
This guide explains how to choose a simple background, use soft light and compose images that capture both detail and placement. You’ll also learn to keep edits restrained, so colours stay believable and skin tones look natural. The goal is a clear, considered photograph, not a polished image that misrepresents fresh work.
Key Takeaways
- Choose a clean, uncluttered background that contrasts with the tattoo so the design stays the focus.
- Keep edits subtle: preserve the tattoo’s real-life colours and natural skin tones rather than relying on filters.
- Use soft, indirect light and avoid mixing light sources to reduce glare and colour shifts.
- Frame both a close detail and a wider view to show how the tattoo sits on the body; consistent composition helps create a cohesive portfolio.
1. Choosing simple, contrasting backgrounds
A plain background gives the tattoo visual priority. Choose a clean, blank surface with enough contrast to separate the design from its surroundings. For example, a dark tattoo may read more clearly against a light backdrop, while a lighter design may stand out against a darker one. Check the contrast on your camera screen before taking the photo.
Clear distractions from the frame before positioning the subject. Tattoo equipment, spilled ink, tables and feet can draw attention away from the artwork. A clean sheet makes a simple backdrop; a solid-colour wall works when a sheet isn’t practical. Keep the surface tidy and free of folds or marks that compete with the tattoo’s lines.
Use a consistent background for portfolio photos. Repeating the same plain setup helps viewers focus on differences in placement, shape and detail, rather than changing scenery. For a tattoo on an arm or leg, position the limb so the background fills the frame behind it. Move the camera or adjust the subject’s angle if room details show at the edges.
Keep any watermark on the background, not across the tattoo or the person’s skin. This preserves visible detail while identifying the image. Before shooting, review the frame from edge to edge: remove objects, check that the background contrasts with the tattoo, and make sure no distracting surface cuts through the composition. These small checks help keep the photo clear without changing the tattoo’s appearance.
Choosing a backdrop simplifies the photo before you raise the camera. A plain background keeps attention on the tattoo, while a clean, uncluttered setting avoids competition from equipment, spilled ink, tables or feet. The aim isn’t to add decoration, but to stop surrounding objects from pulling focus.
Either option provides a simple setting, as long as it stays clean and free of distractions.
2. Editing photos while keeping tattoos and skin tones accurate
For an immediate photo of finished work, capture the tattoo after the artist’s final clean and follow their aftercare instructions. Fresh skin can look redder, making tattoo colours appear warmer than they may later.
Keep edits restrained. Adjust exposure or white balance to correct the photo, not redesign the tattoo’s appearance. If black ink looks grey on screen, check the exposure before increasing contrast. If skin looks unusually orange or cool, adjust white balance and compare the result with what you see in person. Avoid filters and heavy saturation: they can shift ink colours and make skin tones look unnatural.
To photograph the tattoo clearly without irritating the area, keep handling to a minimum. Set up the camera before asking the person to move, and avoid repeated rubbing or touching to improve the image. Focus sharply on the tattoo’s details, then review the photo without pressing or stretching the skin.
Keep the bandage or protective film in place according to the tattoo artist’s instructions. Don’t peel it back just for a photo; take the image once removal is appropriate under the aftercare directions. If the area looks increasingly inflamed, feels unusually painful or causes concern, pause photography and contact the tattoo artist.
For consistent colour and detail, use the same editing approach across your portfolio. Apply consistent white balance and exposure, then check that skin looks natural and ink colours resemble the tattoo in person. Compare the edited photo with the original before saving. Avoid smoothing skin texture or sharpening so aggressively that clean lines look harsher than they are.
A repeatable editing process makes images easier to compare without making them look artificial. Keep an unchanged original and save the adjusted version separately. This preserves the source if an edit pushes colour or contrast too far. Make small adjustments, review the tattoo and surrounding skin together, and stop when both look credible.
You can photograph the tattoo immediately after the artist’s final clean, provided you follow their aftercare instructions. Keep any bandage or protective film in place until removal is appropriate under those instructions.
3. Soft, indirect light and avoiding mixed light temperatures
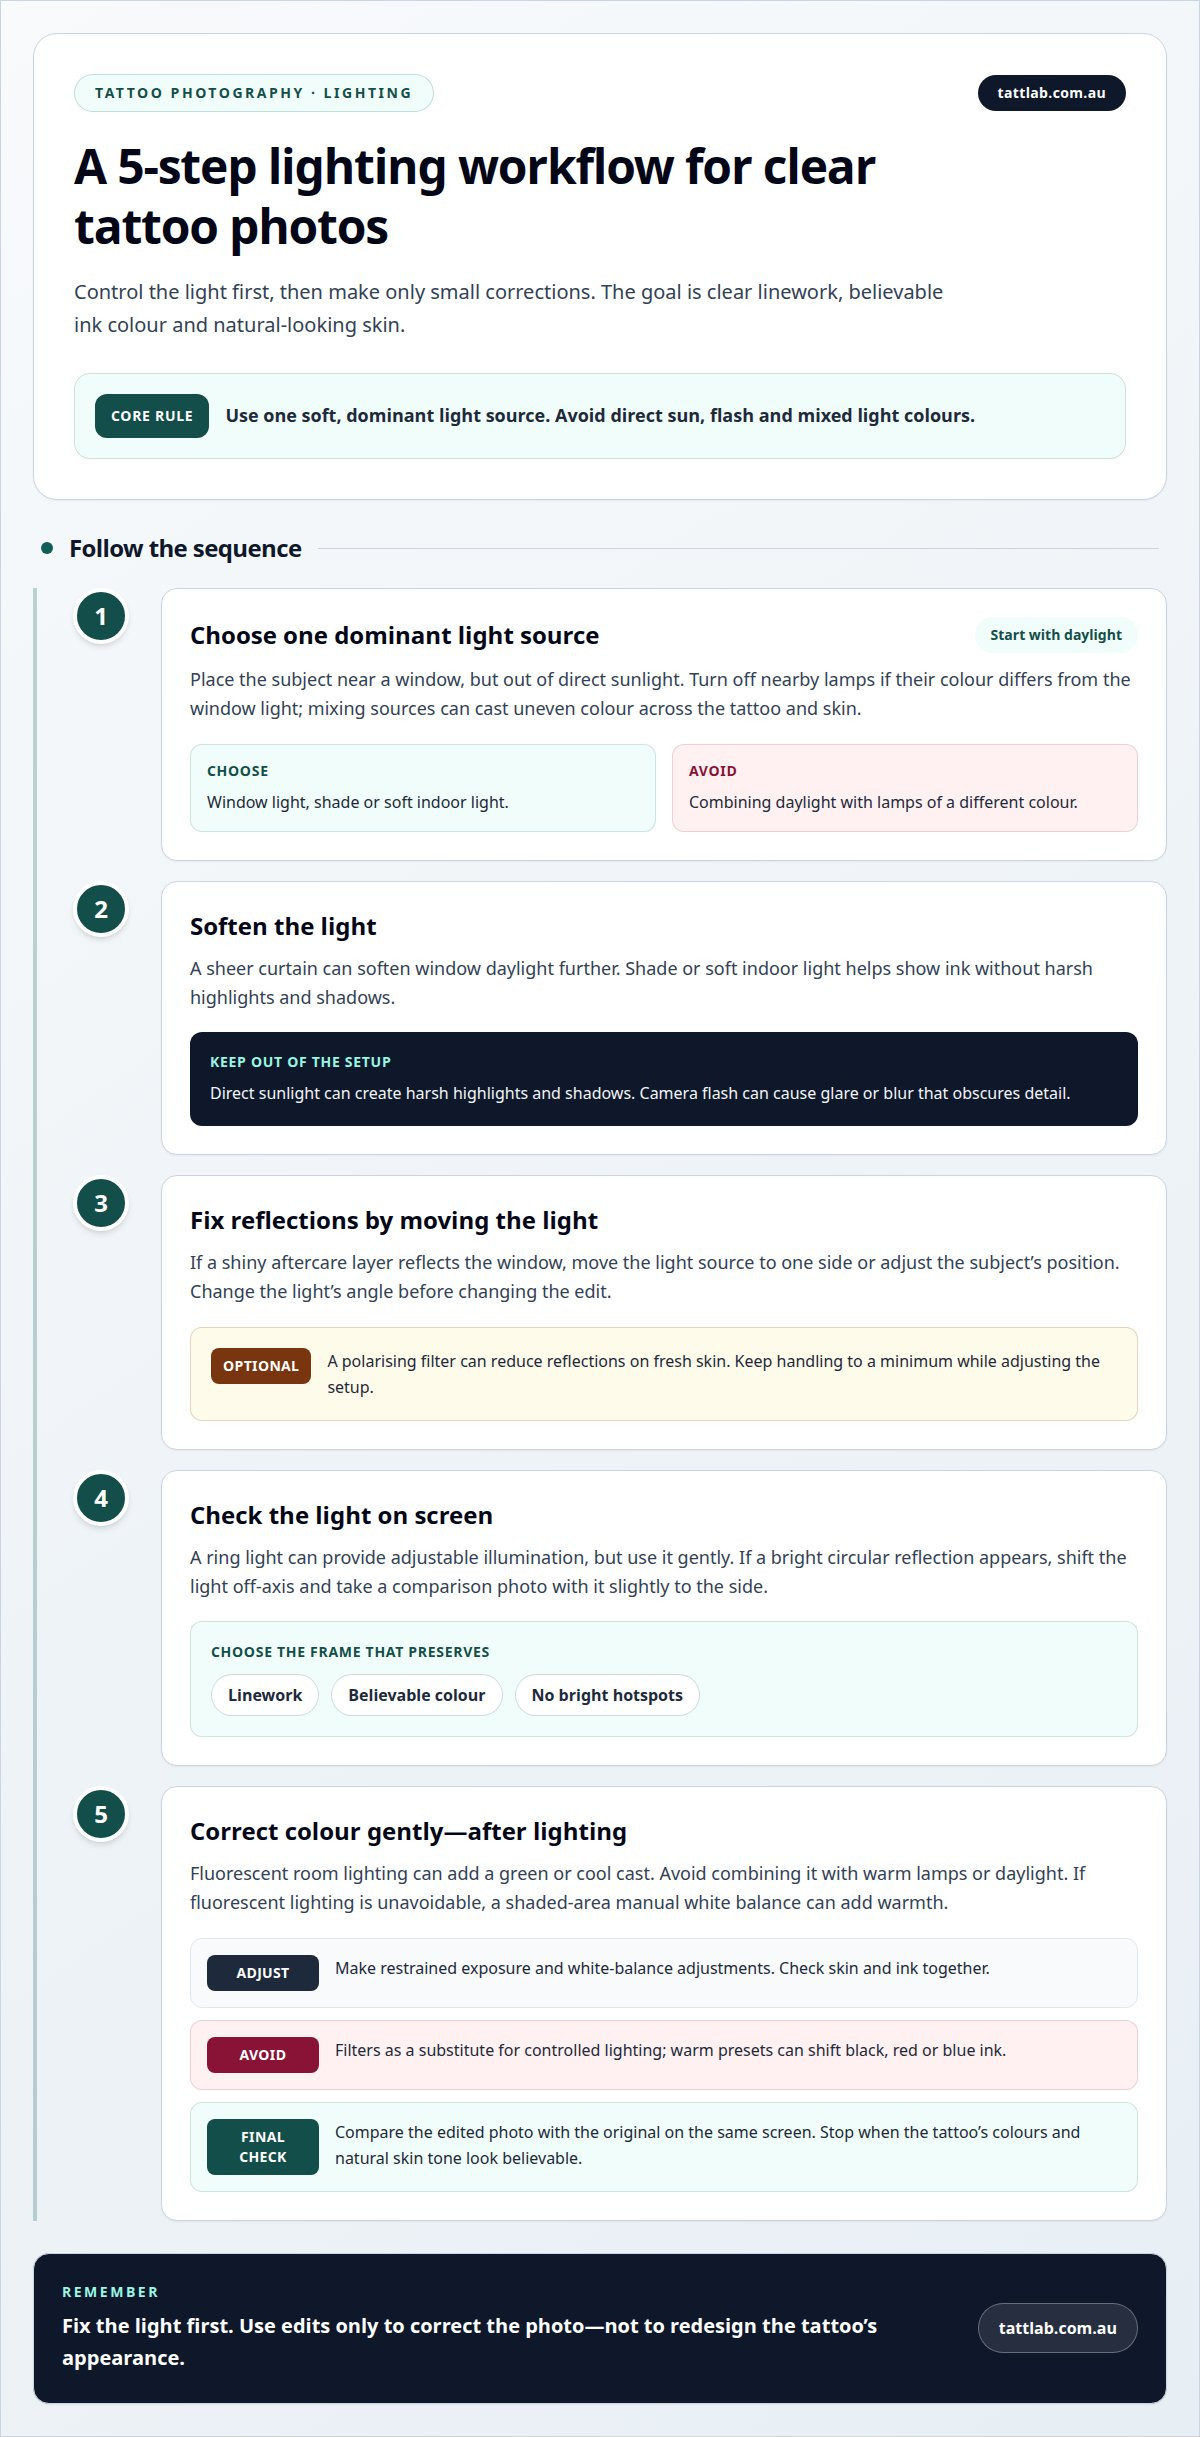
Soft, indirect light shows ink without harsh shadows. Place the subject near a window, out of direct sunlight. A sheer curtain can soften daylight further. Turn off nearby lamps if their colour differs from the window light. Mixed light sources can cast uneven colour across skin and tattoo.
Camera flash can create glare or blur that obscures detail. Direct sunlight can produce harsh highlights and shadows too. For a fresh tattoo photo, choose shade or soft indoor light instead of relying on flash. The aim is an accurate, clear image.
To reduce glare, change the light’s angle before changing the edit. If a shiny aftercare layer reflects the window, move the light source to one side or adjust the subject’s position. A polarising filter can reduce reflections on fresh skin. Keep the tattoo visible without repeatedly touching or repositioning the area.
A ring light offers adjustable illumination, but use it gently and check the result on screen. If a bright circular reflection appears, shift the light off-axis. Take a comparison photo with the light slightly to the side. Choose the version that preserves linework and colour without bright hotspots.
Fluorescent room lighting can add a green or cool cast. Avoid combining it with warm lamps or daylight; choose one dominant light source. If fluorescent lighting is unavoidable, a shaded-area manual white balance can add warmth. Review skin and ink together, since correcting one while ignoring the other can misrepresent both.
Filters can’t replace controlled lighting. A warm preset may hide a cool cast, but it can also shift black, red or blue ink. Fix the lighting first, then make restrained exposure and white-balance adjustments. Compare the edited photo with the original on the same screen. Stop when the tattoo’s colours and natural skin tone look believable.
Flash can cause glare or blur, while direct sunlight can create harsh highlights and shadows. Use shade or soft indoor light to photograph the tattoo clearly.
4. Composing photos to show tattoo placement and detail
A strong tattoo photograph shows both the design and its place on the body. Taking good photos of fresh tattoos means capturing a close view for linework, then a wider frame showing the arm, leg, back or other placement. Together, these views give a fuller record than either image alone.
Keep the camera level with the tattoo when possible. A steep angle can distort proportions, making a straight design look curved or changing how it follows a limb. For a forearm tattoo, turn the arm naturally and photograph the design from the front. Add another angle only if it reveals a meaningful contour or detail.
For close detail, focus on the tattoo and hold the camera steady. A 50 mm lens is one option for tattoo photography. Avoid moving so close that the lens changes the design’s proportions; step back and crop closer instead. Check the screen for sharp edges, especially around fine lines and small lettering.
Use the body’s natural position as part of the composition. A shoulder tattoo should show how the artwork follows the shoulder, while a calf design benefits from a view that includes the leg’s curve. Ask the subject to stand or sit comfortably, then adjust the camera height to keep the tattoo’s shape true. Don’t force a pose that creases or stretches the skin.
A deliberate approach to taking good photos of fresh tattoos includes a placement view, a detail view and another angle only if it adds context. Keep framing consistent across portfolio images, so viewers can compare tattoos without distracting changes in distance or orientation. Check each frame for cropped edges, obscured details and perspective distortion before choosing the clearest representation.
For studio work, explore professional tattoo supplies as part of a considered workflow, alongside careful framing and consistent documentation.
Tatt Lab
Tatt Lab supports tattoo artists with professional supplies for a considered studio workflow. Clear photos document finished work, while suitable aftercare helps artists support clients as tattoos heal. The range includes Tattoo Aftercare, Traditional Needles, Tattoo Cartridges and Tattoo Inks.
Turn to Tatt Lab when your studio needs these essentials alongside a consistent approach to photographing completed tattoos. The camera choices are yours: use clear framing, accurate colour and natural skin tones to represent the work faithfully. Supplies support the process, but don’t replace careful lighting or thoughtful composition.
For questions about Tatt Lab’s tattoo supplies, contact Tatt Lab.
Build a photo practice that grows with your work
Each tattoo offers a chance to refine how you document your work. Keep a small set of reference images and note which framing choices best reveal placement, texture and detail. Over time, this visual record can help you develop a recognisable portfolio while representing each piece faithfully. Taking good photos of fresh tattoos isn’t about making skin look flawless; it’s about showing the artwork with care and accuracy.
That same attention carries through the studio workflow. Tatt Lab offers Tattoo Aftercare, Traditional Needles and Tattoo Catridges for artists sourcing professional tattoo supplies. Thoughtful photography and dependable studio essentials both support a considered approach to the work and its presentation.
If you’d like to discuss your tattoo or related supplies, contact Tatt Lab. Keep refining your approach, one clear and honest image at a time.
Frequently Asked Questions
What lighting is best for photographing tattoos?
Soft, indirect light gives a clear view without harsh reflections. On a phone, tap the tattoo on screen to set focus and exposure, then lock them if your camera allows. This helps prevent brightness from shifting when you reframe. Take a test photo and check that dark lines remain visible and lighter areas retain detail before photographing the full design.
How to prepare fresh tattoo skin for a photo safely?
Follow the tattoo artist’s aftercare instructions, and don’t add or remove products just to change the photo. If a dressing or protective film is in place, leave it undisturbed unless the artist’s directions say otherwise. Set up the camera and background first, so the person doesn’t need to hold a pose or have the tattoo touched repeatedly.
How to edit tattoo photos without misrepresenting the tattoo?
Keep the original image, then make modest corrections to exposure and white balance. Avoid tools that remove skin texture, recolour the ink or reshape the design. A useful check is to view the edited image beside the original on the same screen. If the tattoo’s hue, linework or surrounding skin looks noticeably different, reduce the adjustment.


Comments (0)
There are no comments for this article. Be the first one to leave a message!