
The biggest mistake an apprentice can make is buying a full setup before understanding how their studio works. A tattoo apprentice equipment checklist should begin with what you need for supervised learning, not a pile of gear chosen in isolation. It’s natural to want to arrive prepared, especially when hygiene supplies, workstation items and tattoo consumables all seem important. The right choices depend on your mentor’s procedures and your stage of training.
This guide helps you organise a practical, safety-conscious checklist, separating personal learning tools from equipment to choose with your mentor. You’ll see which hygiene and workstation supplies to discuss, how to approach needles, cartridges, inks and stencils, and why machine choices are best made with guidance. In Australia, infection prevention is foundational to tattoo training, so the checklist prioritises safe studio practices and supervised learning over buying everything at once. Use it to plan a clear conversation with your mentor, then build your kit in step with your studio’s procedures and training plan.
Key Takeaways
- Use the tattoo apprentice equipment checklist to separate practical essentials from items that depend on your studio’s system and your mentor’s instruction.
- Map hygiene and workstation supplies to your studio’s setup sequence, from personal protection through to safe disposal.
- Keep practice materials separate from consumables for supervised client sessions, including needles, cartridges, inks, stencils and aftercare.
- Track each item’s purpose, mentor approval and stock status so you can prepare and replenish your kit thoughtfully.
Tattoo Apprentice Equipment Checklist: Start with Your Training Role
You don’t need to buy a complete tattoo setup before your apprenticeship begins. Build a useful tattoo apprentice equipment checklist in stages, based on what you’re learning and how your studio works. The goal is to arrive ready for supervised training, not to equip an independent practice or start tattooing without your mentor’s direction.
Separate personal learning materials from studio-controlled equipment and procedures. A sketchbook and a way to record feedback can support your learning. Machine systems, supply compatibility, workstation setup and hygiene protocols need to fit the studio’s established workflow. This distinction helps you avoid unsuitable purchases and keeps safety decisions within supervised training.
What an apprentice checklist should cover
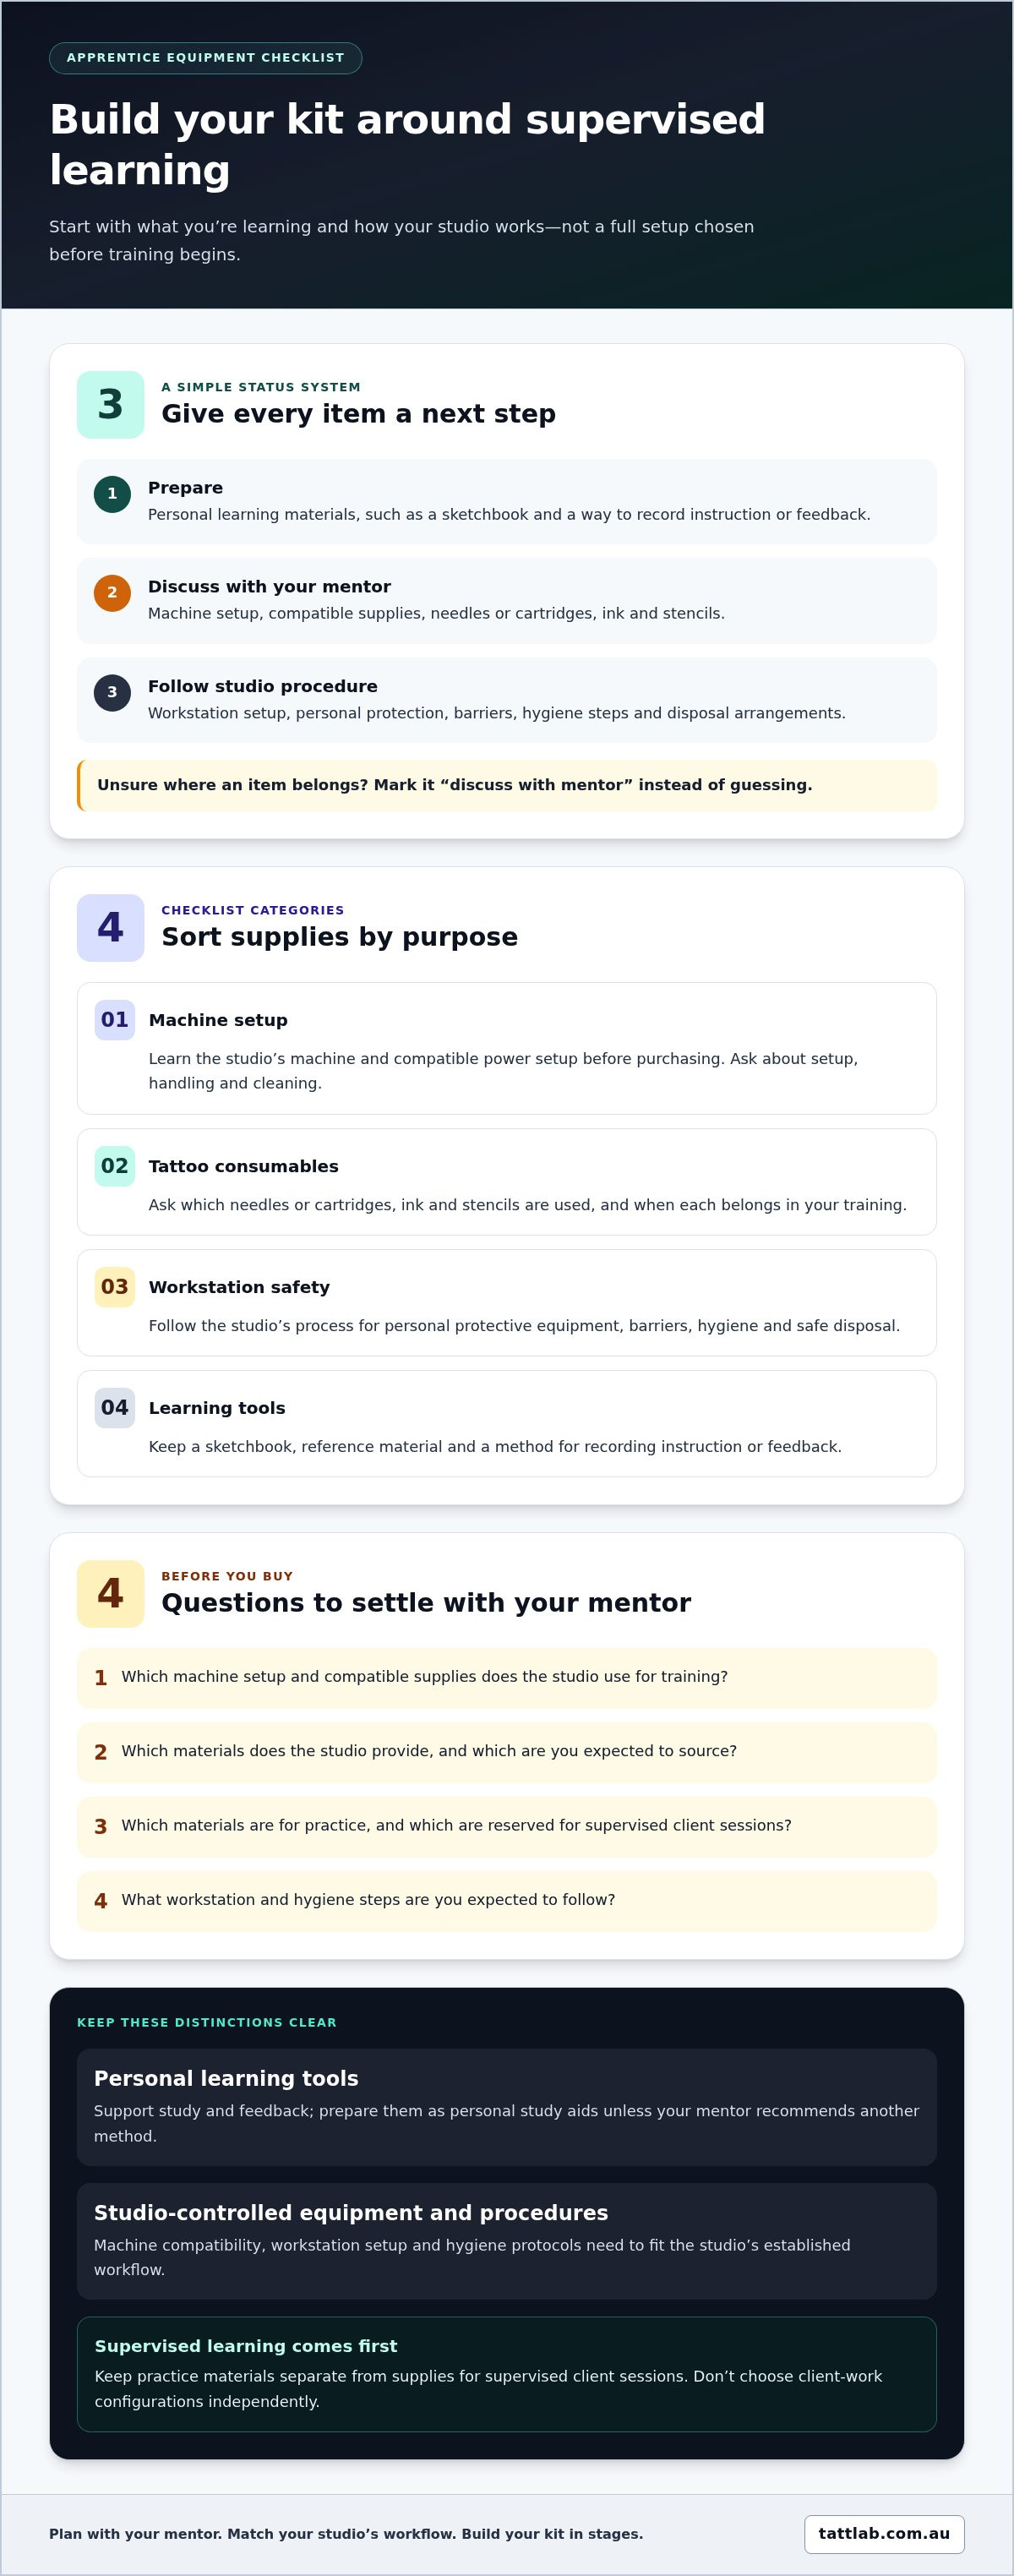
Group potential items by purpose, then assign each one a status: prepare, discuss with mentor or follow studio procedure. The exact selection depends on the equipment already in use and your training sequence.
- Machine setup: machine and compatible power setup. Discuss these with your mentor before buying. A tattoo machine overview can introduce different types, but it won’t tell you what suits your studio.
- Tattoo consumables: needles or cartridges, ink and stencils. Discuss what you’ll use and when, since practice materials and supplies for supervised sessions may differ.
- Workstation safety: personal protective equipment, barriers and disposal arrangements. Follow the studio’s procedures rather than assembling a separate system.
- Learning tools: a sketchbook, reference material and a way to record instruction or feedback. Prepare these as personal study aids unless your mentor recommends another method.
This overview keeps the list useful without treating every item as an immediate purchase. Some categories support your learning; others are part of a controlled studio setup.
What to agree with your mentor before buying
Use an early discussion to turn broad categories into a practical list for your studio. Compatibility matters: a machine or supply that doesn’t match the studio’s system can add cost and confusion without helping you learn. Your mentor can explain how equipment decisions fit the training sequence, so you don’t prepare for tasks you haven’t been taught.
- Confirm which machine setup and compatible supplies the studio uses for training.
- Clarify which materials the studio provides and which you’re expected to source.
- Separate materials for practice from supplies reserved for supervised client sessions.
- Record the workstation and hygiene steps you’re expected to follow.
Supervised practice and workplace protocols are essential context, not optional extras on a shopping list. If you’re unsure where an item belongs, mark it “discuss with mentor” rather than guessing. This can prevent duplicate purchases and keep your preparation aligned with how you’ll be trained.
Core Tattoo Equipment: Machines, Needles, and Ink
Choose machine and supply types in line with your studio’s equipment system and your mentor’s teaching method, not a generic beginner shopping list. A machine, power setup and needle format need to work together within the studio’s workflow. Treat this part of your tattoo apprentice equipment checklist as a set of decisions to learn, not a prescription to buy every component straight away.
Machine and power setup to discuss with your mentor
The machine moves the needle, while its compatible power setup supplies and controls the equipment as directed in your training. Machine styles differ in design and handling, so start with the system your mentor demonstrates. A general tattoo machine overview can help you recognise broad types, but it can’t replace studio-specific instruction.
Ask your mentor to demonstrate setup, handling and cleaning before you practise. Learn how the studio organises components and which steps you’re expected to perform under supervision. Don’t assume a machine or power component will suit the studio just because it looks beginner-friendly or is described as versatile.
Needles, cartridges, and ink for supervised learning
Needle configurations serve different purposes, such as lining or shading. Learn to select them with instruction rather than treating any configuration as a universal starter option. Traditional needles and cartridges are different supply formats; your mentor can explain which the studio uses and how each fits the machine setup and training task. Don’t choose configurations for client work independently.
Ink is another studio-directed supply. Learn how your mentor selects and handles it within the studio’s procedures. For more background on supply formats and selection, consult this professional guide to tattoo needles and cartridges.
| Equipment | Function | Apprentice decision | Mentor input needed |
|---|---|---|---|
| Machine | Moves the needle during tattooing. | Learn the studio’s system before purchasing. | Style, setup, handling and cleaning instruction. |
| Compatible power setup | Powers and supports operation of the machine. | Don’t assume components are interchangeable. | Compatibility and studio workflow. |
| Needles or cartridges | Provide different configurations for tattooing tasks. | Learn formats and intended uses through supervised practice. | Format, configuration and appropriate training stage. |
| Ink | Supplies pigment for tattoo work. | Follow the studio’s selection and handling process. | Approved supplies and procedures for use. |
Once your mentor has identified the relevant categories, organise supplies by type instead of guessing at a setup. Tatt Lab’s range includes tattoo needles, cartridges and inks for sourcing mentor-approved consumables as your supervised training progresses.
Hygiene and Workstation Supplies: Build Safety into the Checklist
Safety depends on a sequence of linked steps, not a collection of products. Organise the hygiene section of your tattoo apprentice equipment checklist from personal protection through to disposal. The materials and order must follow your studio’s training and procedures. Gloves and barriers support infection prevention, but neither creates a sterile environment or replaces formal instruction.
PPE and workstation barriers
Start with personal protective equipment (PPE), then prepare the work area as taught. Add gloves and relevant medical supplies as categories to discuss with your mentor, since studio protocol determines what is used and when. Barriers go on designated work surfaces or equipment to help protect them from contamination during a session. They’re one layer in a broader process, not a substitute for hand hygiene, correct cleaning or safe handling.
Keep the sequence clear:
- Personal protection: identify the PPE and medical supplies required by studio protocol.
- Clean setup: prepare the workstation using the studio’s cleaning products and method.
- Barriers: apply the required barriers to designated surfaces and equipment.
- Safe disposal: separate used sharps and disposable supplies according to studio training.
Learn which areas need barriers and how the studio expects the station to be prepared before a session. Don’t treat a barrier-covered surface as clean by default. Preparation and cleaning are separate steps.
Cleaning, sharps, and studio procedures
List cleaning products separately from single-use items. Cleaning products are used as part of the studio’s workstation process; disposable supplies are discarded after use as instructed. Reusable equipment follows the studio’s designated cleaning and, where applicable, reprocessing procedures. Don’t decide independently whether an item can be reused or how it should be treated.
Sharps and other disposable items need their own disposal pathway. Your mentor should show you how the studio separates and handles them, including where they go after use. Learn disposal and reprocessing procedures through hands-on training and applicable guidance, rather than relying on a generic equipment list.
Australian requirements can vary between jurisdictions, and guidance may change. Before making legal assumptions, check current advice from the relevant authorities for your location and follow your studio’s established procedures. A medical supplies and studio safety guide can add context, but it doesn’t replace training or applicable guidance.
Write each item beside its purpose and the procedure it supports. This makes it easier to distinguish what you need to prepare from what the studio controls. Tatt Lab’s medical supplies can be included on a mentor-approved preparation list when they fit your studio’s protocol.
Consumables and Practice Materials: Complete the Apprentice Kit
Consumables are easier to manage when you separate learning exercises from supplies intended for supervised client sessions. Make that distinction clear on your tattoo apprentice equipment checklist: practice materials support a training task, while session supplies must fit the studio’s process and be handled under its direction. Keep them in separate categories so personal study materials aren’t mistaken for approved client-session stock.
Stencil and practice materials
Tattoo stencils can be used for learning and supervised work, but those uses aren’t interchangeable. A stencil used for a practice exercise is a learning material; one prepared for a client session is part of the studio’s workflow. Ask your mentor which stencil supplies suit your current exercises and which are managed as studio consumables.
Practice surfaces and other learning materials should also match your agreed training plan. Note the surface or exercise your mentor has approved, then record any stencil materials needed for that task. Don’t turn a practice exercise into unsupervised tattooing or use session supplies outside the studio’s direction.
Consumables to keep organised
Use clear category labels, then track whether items are available, opened, depleted or due for replenishment according to studio procedures. This gives your mentor a quick view of what’s needed without encouraging independent decisions about how supplies are used or handled.
- Stencils: distinguish learning materials from those prepared for supervised sessions.
- Needles and cartridges: record the formats used in training and follow studio direction for session supplies.
- Inks: keep this category visible and follow the studio’s selection and handling process.
- Aftercare: track it separately, while leaving client aftercare instructions to studio protocol.
A simple stock note can include the item, its purpose, its current status and whether your mentor has approved it for the relevant use. If a supply is opened or running low, record its status as your studio directs. Don’t assume an opened item can be reused or transferred between tasks. Replenish supplies according to the studio’s routine and the materials approved for your training stage.
Ink selection and handling are part of a wider learning process, not just a purchasing decision. This professional tattoo ink guide can help build background knowledge, while your mentor sets the applicable studio practice.
Once your mentor has identified the categories and uses that fit your training, you can shop tattoo stencils, needles, cartridges, inks and aftercare as practical apprentice consumables.
Prioritise Your Tattoo Apprentice Equipment Checklist Before You Buy
A useful tattoo apprentice equipment checklist should help you make deliberate choices, not encourage a large first purchase. Build it in stages: establish what the studio provides and requires, prioritise items your mentor approves for your current training, then replenish supplies as they’re used and your role develops. This keeps purchases aligned with the studio’s equipment, procedures and learning plan.
A practical order for building your kit
Start with the studio’s setup. Identify what equipment and supplies are already provided, along with the workstation and hygiene procedures you’ll be expected to follow. Then separate what you need to prepare personally from equipment managed by the studio. This gives you a clear view of genuine gaps before you spend.
- Confirm studio needs: record what’s supplied, what you’ll learn to use and which procedures guide your work.
- Prioritise approved essentials: focus on mentor-approved consumables and learning materials for your current stage. Leave optional accessories until there’s a clear training purpose.
- Replenish deliberately: update stock status as supplies are opened, depleted or due for restocking under studio procedures.
Keep the checklist simple enough to use. Add columns for item, purpose, mentor approval and stock status. For example, note that a stencil is for a specific learning exercise, while ink or needles are for studio-directed use. This makes it easier to spot duplicates and distinguish personal study materials from supplies intended for supervised sessions.
Before placing a large or duplicate order, review the list with your mentor. They can help confirm which categories fit the workflow and training plan. An item that looks useful in a general starter kit may not suit the studio’s equipment or current teaching sequence.
Restock confidently with an artist-owned supplier
As approved supplies need replenishing, keep the list at category level and follow the studio’s requirements for selection and use. Tatt Lab is an artist-owned Australian supplier with a professional range that includes tattoo needles, cartridges, inks, stencils, aftercare and medical supplies. You can shop online across Australia, with same-day dispatch from the warehouse.
The checklist remains your guide: it helps you shop for relevant categories without treating every available item as a personal requirement. Keep client-session products under mentor direction, and let studio procedures determine how supplies are selected, handled and replenished.
Once your list is aligned with your training plan, browse tattoo and medical supplies to find the approved categories you’re ready to source.
Build Your Kit as Your Training Progresses
Your first equipment list doesn’t need to be final. Treat it as a working document and update it as your mentor introduces new skills, studio procedures or approved supplies. That keeps your tattoo apprentice equipment checklist connected to your learning, rather than turning preparation into a race to own more equipment.
When your list matches your training, you can source the categories you need with greater confidence. Tatt Lab is an artist-owned Australian supplier with ranges including needles, cartridges, inks, stencils, aftercare and medical supplies. It offers nationwide online shopping and carbon-neutral shipping.
Browse professional tattoo and medical supplies at Tatt Lab when you’re ready to source mentor-approved items. Keep progressing one considered step at a time. A well-prepared apprentice develops through sound habits, attentive learning and steady practice under supervision.
Frequently Asked Questions
Can a tattoo apprentice practise on fruit or synthetic skin?
Yes, an apprentice can practise on fruit or synthetic skin if the material and exercise are part of the mentor’s training plan. These exercises can help develop hand control and familiarity with equipment, but practice on a surface doesn’t demonstrate readiness to tattoo a person. Keep practice separate from client work, and don’t move to live tattooing unless your mentor has taught and authorised the next step.
Is it safe to use tattoo ink after its expiry date?
Don’t use ink past its expiry date unless your mentor has assessed it in line with the label and studio procedures. If the date, condition or suitability is uncertain, set the ink aside rather than using it in practice or a client session. Keep the product details available, including its label information, so your mentor can assess the stock and decide what to do next.
Can tattoo needles or cartridges be reused during practice?
Follow the product’s intended use and your studio’s infection-control procedures. Don’t reuse needles or cartridges intended for single use, even for practice. Learn to handle and dispose of supplies under direct supervision, and don’t improvise a cleaning or reuse method. If you’re unsure how a particular item should be treated, pause and ask your mentor to explain the procedure and applicable local guidance.
Do tattoo apprentices need their own tattoo machine?
Not necessarily. Equipment arrangements can differ between studios and training stages, so first learn the studio’s machine system and training plan. A personal machine may not match the studio’s setup or teaching approach. Discuss compatibility and supervised setup with your mentor before buying. Owning equipment doesn’t qualify an apprentice to tattoo independently; progress depends on instruction, practice and approval within the studio’s training process.
What should an apprentice do if a supply package is damaged or unsealed?
Set the item aside and don’t use it until your mentor has assessed it under the studio’s receiving and safety procedure. Packaging condition and product instructions matter, particularly when you can’t establish whether an item is suitable for its intended use. Keep the package and identifying details available, then follow your studio’s direction for documenting the issue and arranging an appropriate replacement.
How should tattoo apprentices organise their equipment between training sessions?
Keep learning materials separate from supplies reserved for supervised sessions, and organise items so their labels and status are easy to check. Follow product instructions and studio procedures for storage rather than guessing at conditions or time limits. An inventory can record what’s available, what has been opened and what needs replenishing. This helps you prepare for the next session without replacing formal storage guidance.
Do tattoo apprentices need to understand Australian safety rules before working in a studio?
Yes, apprentices should learn the studio’s safety procedures and understand which requirements apply in their state or territory. Don’t assume one rule or process applies uniformly across Australia. Use current guidance from the relevant official authorities, and ask your mentor how the studio puts its obligations into practice. This helps connect formal requirements with the steps you’ll follow during supervised training.


Comments (0)
There are no comments for this article. Be the first one to leave a message!